I find it a useful tool for simple image editing, as well as uploading images to the Web.
There may be better tools around that do lots of different things better, but as far as ease of use, cost (free), and cross-platform compatibility (I use Mac and Windows), it's hard to beat.
Today, someone asked a question about resizing images in bulk for inclusion in email. And, Picasa is an easy-to-use tool for that. Here's how...
Installation
I'll assume you've already installed Google Picasa on your Windows (or Mac). If you haven't, go ahead and do that.
For Windows, I tell it to only look in the "My Documents" or "My Pictures" area, rather than the entire hard drive. Other than that, though, I usually accept the default settings.
Resizing
In order to resize the pictures, it's pretty simple.
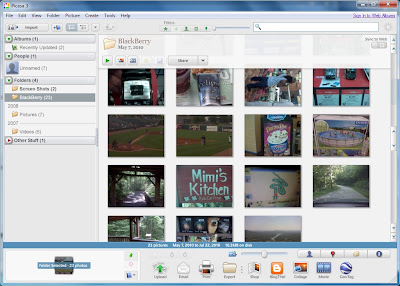
After opening Picasa, find the images you want to resize by navigating to that folder:

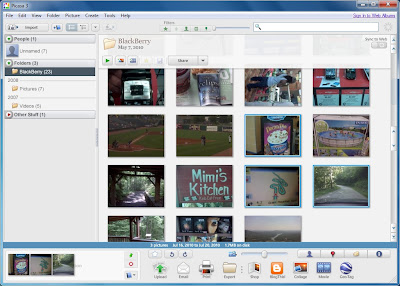
Now that you have the folder, select the images by CTRL-Click (Windows) or COMMAND-Click (Mac):

Click the "Export" icon at the bottom of the screen:

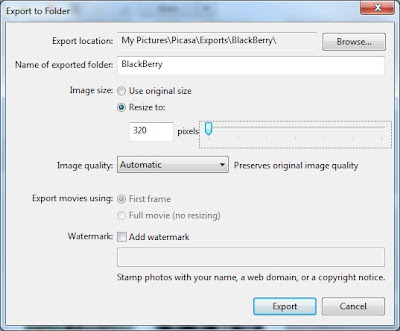
From the pop-up window, select the size you want, then press "Export":

The standard default location works for me.
And that's it!
Conclusion
Personally, I find it a very easy-to-use way to make simple edits, including resizing, to images.
Plus, I like the fact that the original file isn't changed. I can undo any edit I want on the original file. And, when I export, I have a second (edited) version I can use as I wish.
No comments:
Post a Comment
Please choose a Profile in "Comment as" or sign your name to Anonymous comments. Comment policy